Showing posts with label Chocolate. Show all posts

September 14, 2009

Martha Stewart Cookies

So Saturday night, the cool people that we are, my roommate and I decided that instead of going out and enjoying New York City to the fullest, we were going to make cookies. Okay, that's not quite true. We didn't know what to do, and at 11 o'clock, after it was assessed that we were not going out, making cookies seemed like the best alternative. 
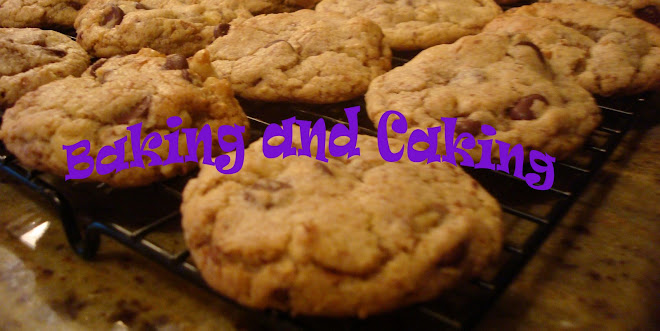
Usually, when I make the classic chocolate chip, I always fall back on Alton Brown's classic chewy recipe, but to make those, you a) need bread flour b) need to refrigerate and c) really need a mixer. Having none of said items or time, I decided upon another classic's recipe - Martha Stewart. Charlotte mixed it almost all entirely by hand - clap clap Charlotte! - and this was her first "cookie dough/sleepover" experience. Whatever that means. Having no mixer caused it to be a little runny since we couldn't cream the butter properly, but aside from being a bit flat, they were classic chocolate chip cookies. The perfect fix for our late night craving.
Thumbs up from Jessica.
Chewy Chocolate Chip Cookies Adapted from The Martha Stewart Cookie Book

Ingredients

  • 2 1/4 cups all-purpose flour
  • 1/2 teaspoon baking soda
  • 1 cup (2 sticks) unsalted butter, room temperature
  • 1/2 cup granulated sugar
  • 1 cup packed light-brown sugar
  • 1 teaspoon salt
  • 2 teaspoons pure vanilla extract
  • 2 large eggs
  • 2 cups (about 12 ounces) semisweet and/or milk chocolate chips

Directions

  1. Preheat oven to 350 degrees. In a small bowl, whisk together the flour and baking soda; set aside. In the bowl of an electric mixer fitted with the paddle attachment, combine the butter with both sugars; beat on medium speed until light and fluffy. Reduce speed to low; add the salt, vanilla, and eggs. Beat until well mixed, about 1 minute. Add flour mixture; mix until just combined. Stir in the chocolate chips.
  2. Drop heaping tablespoon-size balls of dough about 2 inches apart on baking sheets lined with parchment paper.
  3. Bake until cookies are golden around the edges, but still soft in the center, 8 to 10 minutes. Remove from oven, and let cool on baking sheet 1 to 2 minutes. Transfer to a wire rack, and let cool completely. Store cookies in an airtight container at room temperature up to 1 week.
Of course we had to make a super big one for everyone :-)

June 15, 2009

Chocolate Chocolate Mint Cookies

So I have begun the long and tedious process of figuring what is going to come up to New York with me in the fall and what shall not. My dad and I are going to drive up, so I have some freedom of what I can put in the car, but my dorm room is probably going to be pretty small, so I have to take that into consideration. I'm planning on getting a dorm that is apartment style which means I shall have kitchen. WOOT WOOT!! I already know who my roommate is going to be. She is AMAZING!! Not only does she like to bake, but she speaks French, has lived all over the world and basically seems like one of the most awesome people ever. I can't wait until I actually get to meet her in person. 
Anyway, back to packing and not packing. So since I'm hopefully getting a dorm with a kitchen, I have to bring all my cook books, which over the past fews years has grown exponentially. Most are baking books, but I have collected a few others so that if I ever feel the need to cook myself an actual meal, I can do that as well ;) So not only do I have cook books, I also have a binder where I collect recipes that I print or cut out from the newspaper and from said book is where I found this lovely recipe. It has not title, no author, no anything - just a page of ingredients and some instructions. I was little skeptical because if I do use a recipe from online, I usually like to look at the reviews, but no reviews needed for these because they were INCREDIBLE!! Chocolatey goodness with a strong hint of mint - some people might find the mint overwhelming, but I loved it. Even my dad and step-mom liked them too. This has made me realize that I need to be a bit more adventurous in my baking and not always follow a trail that has already been followed, but to start my own paths and back thinks that I have no idea how they turn out. 
Ingredients:
  • 3.5 oz bittersweet chocolate
  • 1/2 cup butter
  • 2 large eggs
  • 1 1/4 cup white sugar
  • 1 tsp vanilla
  • 1 cup all purpose flour (I used cake flour because I'm out of AP)
  • 1/2 dutch cocoa
  • 1/2 tsp salt
  • 1/2 tsp baking soda (As I read the recipe again now, I realize that I used baking powder and it still turned out fine. Whoops!)
  • 1 1/2 cup Andes Mint Chips
Directions:
  1. Preheat oven to 325 degrees. Line baking sheets with parchment paper. 
  2. In a small saucepan over low heat, melt butter. Add chocolate and whisk until combined. Add vanilla and set aside to cool. 
  3. In a medium bowl, sift together flour, cocoa, baking soda, and salt. 
  4. In a mixer bowl, combine eggs and sugar. Mix until light and fluffy - 3 minutes. 
  5. Decrease speed to low and add melted chocolate mixture. 
  6. Add flour mixture and stir until just combined. 
  7. Fold in Mint Chips
  8. Let batter sit in the fridge for a few minutes to firm up a bit. 
  9. Drop 1 1/2 tbs portions onto a baking sheet 2 inches apart. Bake for 12-13 minutes. The cookies will be slightly under-baked, but will the centers nice and gooey. 
  10. Remove cookie sheets and transfer parchment paper to cooling rack to cool completely. 

May 5, 2009

Raspberry Cheesecake Swirl Brownies

HAPPY CINCO DE MAYO! Okay, so this post has no relation to the lovely holiday that is being celebrated today, but I just thought I'd mention it. An exciting that that did happen today - well exciting to some - is that there was a mother of all storms this afternoon. Tornado watches, lightning, thunder, and the most intense rain storm ever. I was at work, at it's a warehouse, which makes everything sound so much louder, and I seriously thought the building was going to fall down it was raining so hard. Anyway, I actually made these brownies the other night, but I'm just getting around to posting them now. I was really really wanting to make cheesecake brownies and then when I saw this recipe, I knew it was going to be amazing because I LOVE raspberry jam. I have it on toast practically every morning. They were pretty easy to make. I'm not going to lie, they looked rather gross when they came right out of the oven. The pockets where the jam was looked like oozing scabs, but once they cooled and I cut them up, they started to look much more appetizing. That evening when I ate them, they were delicious. Unlike some cheesecake desserts, the cheese wasn't overwhelming and the raspberry jam was subtle yet delicious. I had a few left over and put them in the fridge, but for future reference, I highly recommend just eating them ASAP and not refrigerating them, because they certainly did not taste as good a few days later. adapted from bakingbites.com
  • Ingredients:
  • 1/2 cup butter, room temp
  • 2 ounces chopped dark chocolate
  • 1 cup sugar
  • 2 eggs
  • 1 tsp vanilla
  • 2/3 cup flour
  • 2 tbsp cocoa powder
  • 1/4 tsp salt
  • 8 oz. cream cheese at room temperature
  • 1/3 cup sugar
  • 1 egg
  • 1/2 tsp vanilla
  • 1/3 cup raspberry jam (I guess you could really use any kind of jam you want)
  1. Preheat over to 350 Degrees. Line 8x8 baking dish with aluminum foil and lightly grease. (I used 9x9 because that was all I had - they were just a little thinner, but not noticable.)
  2. In a small bowl, melt chocolate and butter together. Mix until smooth. (I just microwaved) Set aside to cool.
  3. In a large bowl, whisk together sugar, eggs, and vanilla.
  4. Whisking steadily, pour chocolate mixture into sugar mixture. Stir until smooth.
  5. Sift flour, cocoa, and salt into the bowl and stir until just combined.
  6. Pour into prepared pan and set aside for the time being
  7. In a medium bowl, beat cream cheese, sugar egg and vanilla until smooth. Drop big dallops into chocolate (already in pan). Follow by spoonfuls of the raspberry jam.
  8. With a knife, swirl cheese batter and raspberry around chocolate to give swirled look.
  9. Bake for 35-40 minutes until knife inserted into middle comes out clean.
  10. Cool completely before cutting.

April 29, 2009

Alton Brown - The Chewy

I did it. I finally made the chewy Alton Brown chocolate chip cookie that everyone else in the blogosphere seems to have already made. Last night, after spending 2 hours studying European History, 30 minutes running at the gym, and another undetermined amount of time doing absolutely nothing, I figured I might as well use up my wasted time by making some cookies. I did continue to watch the first season of Gossip Girl as I baked - it was 20 bucks at Target last week!!!! Even though I've already seen it all, I can somehow never get my fix of Upper East Side snobbiness. They are just like any other cookie, except have melted butter, much more brown sugar than white, and bread flour. Okay, so they aren't exactly like every other chocolate chip cookie recipe, but they are still pretty easy to make. Too bad my dad is still out of town, because I think he would have enjoyed these better than a lot of the baked goods I often make - since they had mostly brown sugar compared to white sugar, they were not as sweet as usual. Carson, my classmate said "Yum.....Yes, they are chewy without having to gnaw on them. They are soft without tasting undercooked." So all in all, I say this cookie experiment was a success. They are pretty easy cookies to make, come out with a perfect golden brown color, have a nice chewiness and are not deathly sweet. Grade - A Make again - very likely ADAPTED FROM ALTON BROWN ON THE FOODNETWORK.COM
  • INGREDIENTS:
  • 2 sticks unsalted butter
  • 2 1/4 cups bread flower
  • 1 teaspoon kosher salt
  • 1 teaspoon baking soda
  • 1/4 cup sugar
  • 1 1/4 cup brown sugar
  • 1 egg
  • 1 egg yolk
  • 2 tablespoons milk
  • 1 1/2 teaspoon vanilla
  • 2 cups chocolate chips
  1. Heat over to 375 degrees F.
  2. Melt the butter in a heavy-bottom medium saucepan over low heat.
  3. Sift together flour, salt, and baking soda and set aside.
  4. Pour the melted butter in the mixer's work bowl. Add the sugar and brown sugar. Cream the butter and sugars on medium speed.
  5. Add the egg, yolk, milk and vanilla and mix until well combined.
  6. Slowly incorporate the flour mixture until thoroughly combined. Stir in the chocolate chips.
  7. Chill the dough, and the scoop onto parchment-lined baking sheets.
  8. Bake for 14 minutes or until golden brown, checking the cookies after 5 minutes. Rotate the baking sheets halfway through for even browning.
  9. Cool completely and store in an airtight container.

April 27, 2009

Seven Layer Magic Bars

Being the klutz I am, I somehow managed to knock down everything off the side of the fridge the other night - magnets, stamps, newspaper clippings, etc. I really don't know how I manage things like that, but somehow it happened. Thankfully I was able to pick everything up before the cat attacked as I'm sure he would have had a hay day with all those things to play with so easily assecible. While I was picking everything up, I came across the magnetic clip full of recipes that I cut out from the food section of the newspaper every week or so, but which had been hidden behind ten take out menus to our Thai resturant of choice (they always get our order wrong even though we get food from them at least once a week). I looked through them and seriously found some recipes that are at least 5 years old but I have never made. What I did find was a recipe for seven layer bars. I've wanted to make these for soooo long! I swear, I buy graham crackers all the time with the intention of making them, but somehow I've never gotten around to it. Well now was my chance!
These are by far some of the easiest bars to make. All you do is layer the ingredients, pop it in the over, and poof, you have yummy gooey delicious bars of joy. Of course, given such a simple recipe, I had to mess up. I was talking on the phone as I made them, so instead of using one stick of butter, I used two, giving me an excess of butter in comparison to how many graham cracker crumbs I had. I simply added extra crumbs to soak up the butter and it was fine. They could have used 2 less minutes in the over because the coconut was starting to burn by the time I took them out, but they were still so good looking. I cut them into huge sqaures - and a few small ones for me to sample. I took some to hebrew school, along with the thousand other prizes I had picked out for my students, but still almost half of them picked the bars over bubbles, putty, yo-yo's and a paint your own gnome (They're a dollar at Target - very cool). This will from now on be my go to recipe if I ever need to whip up a dessert pretty quickly - 5 minutes prep give or take and just 22-25 minutes in the oven. So easy! Grade - A Make Again - Absolutely!
ADAPTED FROM THE NEWS AND OBSERVER
  • INGREDIENTS:
  • 1 stick of butter, melted
  • 2 cups graham cracker crumbs
  • 2 cups butterscotch chips
  • 2 cups chocolate chips
  • 2 cups toasted pecans - I just threw them in the oven a few minutes before adding them to toast lightly
  • 2 cups sweetened coconut
  • 2 cups sweetened condensed milk
  1. Preheat oven to 350 degrees. Spray the bottom of 9x13 inch baking dish with cooking spray.
  2. Pour the melted butter into the bottom of the dish. Spread the crumbs over the butter and press down firmly.
  3. Sprinkle butterscotch chips, followed by chocolate chips, followed by pecans, followed by the coconut.
  4. Pour the sweetened condensed milk evenly over the top.
  5. Bake for 22-28 minutes. Cool to room temperature before cutting. - I cut mine huge!

April 25, 2009

Mini Cakies

So my dad and step-mom left for Lithuania yesterday. Apparently Wendee has to give a speech and my father decided to tag along so that he could explore Vilnius. They seem to go to some of the most random places in the world. They sent me an email saying there are malls everywhere, so I guess it's really not that different than America - HA! So anyway, I'm home all alone until next Saturday. Well I guess I still have two 100 pound dogs, a mad cat, and some fish to protect me, so I'm not really that worried. But since they aren't home - I CAN BAKE WITH NO ONE YELLING AT ME!! YAYAY! To start my week of what will hopefully be lots and lots of baking - coniciding with lots and lots of posts - I decided to make oreo/whoopie pies. I've renamed them mini cakies beacuse that's what they are - mini cakes in cookie form! Basically, they're baby cakes with buttercream icing in the center that I decided to tint pink because white just seemed boring. They were so easy to make. Icing each one and finding matching sides was slightly tedious, but they looked so cool once I was done and they were quite delicious. As I said, they basiclly tasted like tiny cakes, but somehow, since they were in cookie form, they just tasted better. I put them on a plate, but when I went to pick one up a few hours later to eat, it was sticking to the plate. I quickly transfered them to plate covered in wax paper so they wouldn't stick anymore. When my step-nephew came over, he ate one and gave it a grade of A++. Thanks Skylar!!
ADAPTED FROM FOODISLUV.BLOGSPOT.COM
  • INGREDIENTS:
  • 1 3/4 cups flour
  • 1/2 cup cocoa powder
  • 1 teaspoon baking soda
  • 1 teaspoon salt
  • 1 cup buttermilk (or milk)
  • 1 teaspoon vanilla
  • 1/2 cup (1 stick) unsalted butter , room temperature
  • 1 cup brown sugar, packed
  • 1 egg
  • vanilla buttercream
  • 1/2 cup (1 stick) unsalted butter, room temperature
  • 2 cups powdered sugar
  • 1 teaspoon vanilla
  • 2 tablespoons cream
Directions:
  1. Preheat oven to 350 degrees.
  2. In a large bowl, add the flour, cocoa powder, baking soda and salt. Whisk together until well combined and set aside.
  3. In a small bowl, stir together the buttermilk and vanilla and set aside.
  4. In the bowl of an electric mixer, fitted with the paddle attachment, beat together the butter and the brown sugar until creamy and fluffy - about 3 mins.
  5. Add the egg and beat until well combined.
  6. Add the flour mixture and buttermilk in batches, starting and ending with the flour. scrape down the bowl several times, ensuring that everything is well combined. mix just until all the ingredients are combined, do not over mix.
  7. Using a pastry bag fitted with a large circle tip, pipe out the batter in 1 1/2 inch circles on a baking sheet lined with parchment paper, leaving at least 1 inch between each. dip your finger in water and shake off excess. With your wet finger, gentley press down the top of each cookie.
  8. Bake in for 8-10 minutes. Using a metal spatula, transfer to a wire rack and cool completely.
  9. In the bowl of an electric mixer fitted with the paddle attachment, beat together the butter and sugar. Start on low speed until combined and then increase speed to medium and beat for approximately 3 minutes.
  10. Add vanilla and cream and beat again. About 1 min more.
  11. Match up cookies in like sized pairs. Spoon buttercream on one side and sandwich with the other.

April 21, 2009

Swirled Brownies

So tomorrow is my friend Jackie's' 18th birthday!! YAYA!!! Jackie loves socks, so last year I got her socks and this year I plan on getting her a biography of Benjamin Franklin. Why? you might ask. Well, she is going to Penn next year and I was reading in a college book and they had lists of different things you should have/get before you go to college. One of the things on the list for Penn was Franklin's biography. I thought it would be funny - but I doubt she will get it at first. Anyway, I had to make her something edible as well, and when I asked her what she wanted, she "Surprise me." But soon after she said, "Brownies." I didn't want to make just plain chocolate brownies because those are just boring. I was going to do something with peanut butter, but when I returned home from school I realized that we were basically out of peanut butter. Oh no! So I settled on a mix - half brownie/half blondie. I just took a pretty basic blondie recipe, split it in half, added some cocoa to one half, and then because I felt like it, I put in about a cup or so of chocolate chips just to add a little flare to them. The final result looked really cool - black and white with hints of chocolate chips that had melted in some places and stayed whole in other. They were a little dry. I took them out of the oven after 25 minutes, but they probaly could have used a few less, so a glass of milk I'm sure would complement them perfectly. I certainly hope Jackie likes them!

Ingredients:

  • 2/3 cup vegetable oil
  • 2 1/4 cups light brown sugar
  • 2 2/3 cups plain flour
  • 3 eggs
  • 2 teaspoons baking powder
  • 1 teaspoon salt
  • 1 cup chocolate chunks, or chips

Directions:

  1. Preheat oven to 350 F
  2. Grease a 13×9 inch baking pan, line the pan with parchment paper or aluminum foil – making sure to leave an overhang on the sides - and grease that again.
  3. In a large bowl, mix together oil and brown sugar. Then add the eggs one at a time and beat until smooth, scraping down the sides after each addition.
  4. In a separate bowl, sift together dry ingredients and then add them to the brown sugar mixture. Mix well.
  5. Split batter into two separate bowls.
  6. Mix the one half of the batter with 1/4 cup cocoa, leaving the other half as is.
  7. Mix chocolate chips into blondie batter and then spread batter out onto prepared pan
  8. Drop the chocolate batter by heaping spoonfuls into the pan the blondie batter.
  9. Using or knife or spoon, marble the two batters together – as much or as little as you like!
  10. Bake until a toothpick inserted into the center comes out clean, about 25-30 minutes. Remove from oven and let cool. After 20 minutes or so, remove from pan and let complete cooling on baking rack.